My first attempt at this technique, I've framed the finished project for my daughter as she has a Gecko called George.
I did the gecko stencilling first having watched and spoken to the lovely Lucy Ellis from
Sweet Poppy Stencils who guided me through the technique.
I told Lucy about this Gecko stencil I had from Dreamweaver and that I wanted to use it for my Daughter's birthday and I said I'd share the results once I'd finished.
I purchased the stencil when I saw it thinking of my daughter but having no idea what I'd do with it!
Once I'd coloured, used the paste and micro beads I left the Gecko aside to dry, I then went back to it to decide what to do next...
I'd already thought I'd use the Splodgeaway stencil as it was about the only thing I could find in my stash that I thought would work.
I tend to work with a vision, picture or story in my head and for this I kind of thought about mosaic work initially.
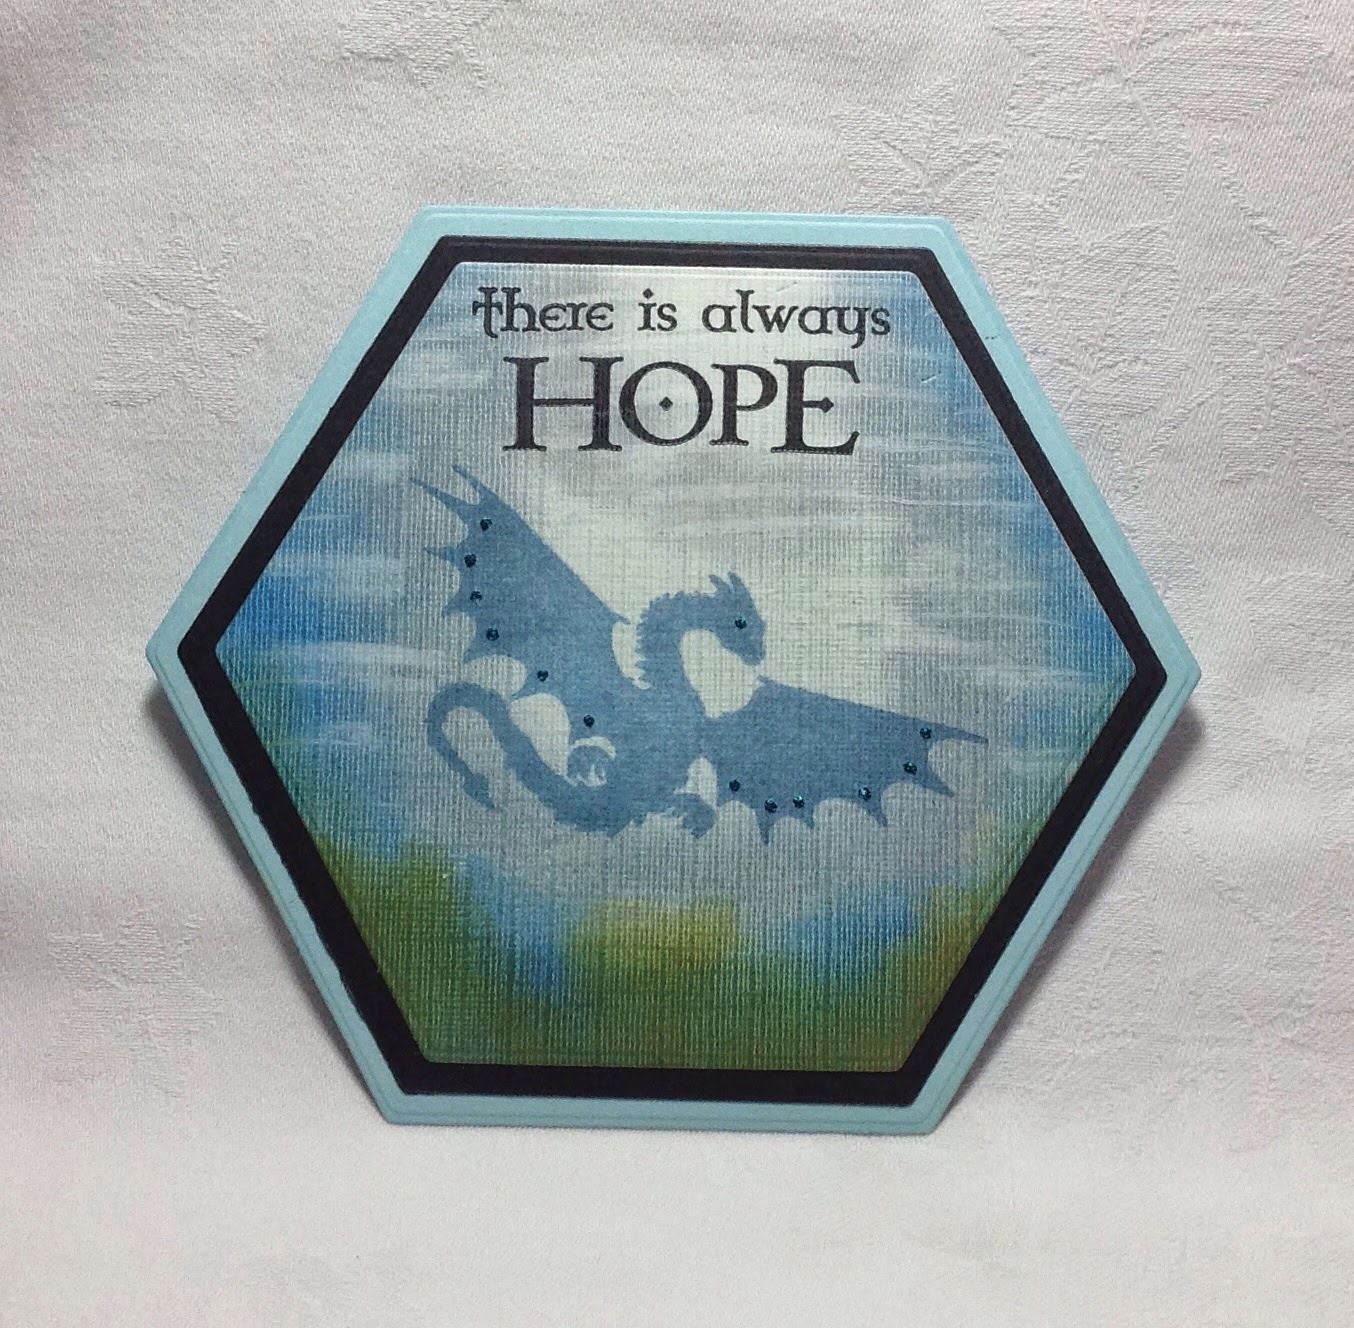
Next I decided as purple is my daughter's favourite colour I used Picked Raspberry distress ink for the centre.
I sponged this on to achieve a deep colour which appears to look like velvet.
After adding Black Soot in the corner areas I then decided to use gilding flakes around the edge.
I love the touchy feely affect and was very pleased with the outcome.
Hope you like it too, I'll definitely be doing more of this xKx
Saturday, 31 May 2014
Friday, 30 May 2014
Celebrating a Birthday
Morning bloggers and crafters,
Yesterday we celebrated my daughter's birthday and I thought I'd share the card I made for her.
This is what I've done for as long as I can remember, making Keepsakes for family and friends.
I've used papers and card embellishments from Craftwork Cards bits and bobs from
Sweet Lilac Flowers including the flowers, lace and the pearly accents.
Added from my stash, the tulle tied into a bow, hat pins, wooden buttons, string pearly beads and scrim fabric.
The alphabet was die cut from a Die-namics die from Oyster Paper Crafts.
When we look back at the family cards I've made they've changed quite a bit over the years with style and technique but all hold special memories.
Thanks for looking today, crafty hugs xKx
Thursday, 29 May 2014
Visible Image Thursday Blog, Mixing up the Stamp Sets
Mixing up the stamp sets from Visible Image
Today I've used elements of the brand new Orin Destiny set with the Forest Background and Mystical Map along with The Grunge Flourish and Ink Splat from The Free Your Imagination set.
I thought all these elements worked really well together and achieved a design I was very pleased with.
I've stamped with Versafine in Habanero Orange and Imperial Purple.
Have a lovely day xKx
Saturday, 24 May 2014
Welcome to the Land of Fantasy with Visible Image!
Happy Bank Holiday Weekend and here I have to share with you the brand new stamp collection launched today from Visible Image
Pictured below are the sets now available.
The rest of the Design Team have worked incredible hard creating awesome artwork to inspire you. Helen and Mark are a delight to work for, always hugely appreciative of everything we do for them.
They work tirelessly to bring unique, meticulously accurate and detailed designs that are bang up to date.
So here is the collection

The week was incredibly hectic for me and I would have absolutely loved more time to create with these fantastic stamps.
There will be more time but here is what I have done so far and I really hope you like my inspiration and that of the rest of the team.
If you like what you see please take a moment to pop over to the
Visible Image Blog or
Facebook Page to let Helen and Mark know what you think, they really appreciate all your comments and feedback.
For the first two of my makes I used a Pan Pastels, the next uses Luminarte Silks and the last uses stencils, embossing paste and distress inks.
Thank you so much for popping by my blog today, I hope you have a wonderful weekend.
Crafty hugs xKx
Thursday, 22 May 2014
Thursday Blog with Visible Image
It's been a busy week this week, I've been prepping for a further Tarmac workshop at
The Artistic Stamper on Saturday and also creating samples for the launch of the latest
Visible Image Stamp release.
I've had such fun experimenting with these new beauties and I can't wait to share my ideas with you but, I have to be patient until my blog on Saturday.
Back to today's idea based around a secret walled garden.
Stamps used
Grasses
Butterfly
Flower Heads from the Thank You and Congratulations sets
Brick Section from the Max Rocks Set
Live Your Dreams Sentiment
Birds from the Free Your Imagination Set
I stamped all the elements in Versafine inks, Vintage Sepia, Spanish Moss, Habanero and Toffee then I blended distress ink in Scattered Straw for the background after masking the sun area off first.
Finally I blended Vintage Photo distress ink around the outside edge and stamped the birds over the revealed sun.
I was happy with this cottage/secret garden feel and I hope you love it.
Thanks for stopping by today xKx
Saturday, 17 May 2014
Thursday, 15 May 2014
Visible Image Thursday Blog
Today I'm sharing a simple idea for inspiration...
My good friend Eileen Godwin has created some lovely shaped cards recently using nesting dies.
I was going to complete my design on a square or rectangle card but decided the circle would do the job nicely.
I used white linen card available from Papermill Direct, stamped in black Archival and distress markers for the colour
The stamps are
Visible Image
Large Butterfly
Flower head and stem from the Thank You set and the
Butterfly Sentiment
The flower head has been stamped and cut out with a circle punch and along with the butterfly and circle base all mounted using foam pads.
I hope you like this idea...xKx
Subscribe to:
Posts (Atom)