Showing posts with label Techniques. Show all posts

Monday, 2 April 2018

Make Today Amazing...

Hope you're enjoying your Easter weekend, the weather has been a real mix, a lot of rain here and in Surrey and more snow for some of you I know.
Let's hope the sun will shine for us all soon, we could all do with some warm bright days but the lighter evenings are a real treat.
We have spent some time doing necessary jobs and relaxing in between.
Today I was able to completely relax and spent some time designing projects for craft classes which was really enjoyable especially as I didn't have to rush at all.
My choice for today was bright cheery designs and later this month I look forward to sharing the cards and techniques over on the
Craft Show Crafty Bloggers blog.
As a bit of a treat I enjoyed a glass of something while I was crafting away...
I recently discovered Edinburgh Gin, Rhubarb and Ginger liquer, add a slice of lemon and make into a long drink with ginger ale, cheers!
Enjoy your evening and a shorter working week ahead...xKx


Thursday, 8 February 2018

Craft class candle wax resist technique

Today I'm sharing a step by step tutorial by request for a technique used recently at craft class.
It uses a wax candle to create a distressed resist background.

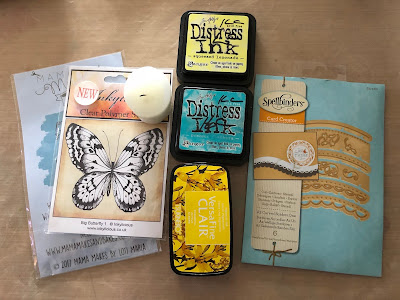
 Ingredients to complete the card include - Inkylicious Bigz Butterfly 1,
Sentiment stamps from Mama Makes, watercolour inspirations,
Spellbinders die set - card creator, curved borders 1,
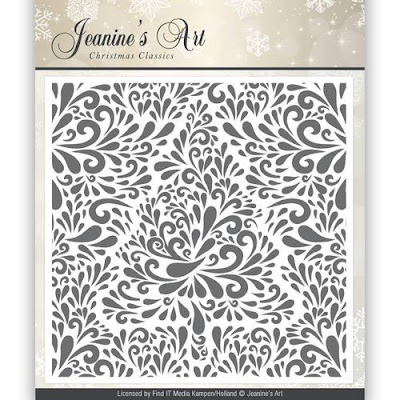
Jeanine's Art Christmas Classics embossing folder - Christmas Tree.
I also used distress inks and Versafine Clair cheerful ink pad, these ink pads are a dream to stamp with, I love their vibrancy and clarity.
To start with I've used the embossing folder and cut a piece of glossy card to size.


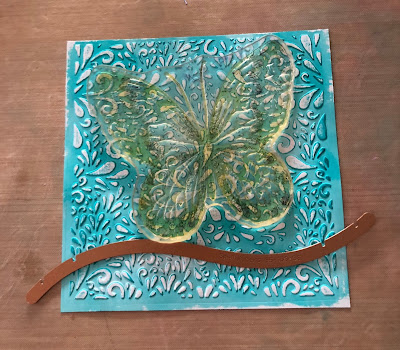
Once the card was embossed I rubbed the whole surface with the side of a candle to apply wax to the surface, then on top of the wax surface blended distress ink with a smoothie sponge.
The colour used is Peacock Feathers.


Once finished inking, polish the whole area with a paper towel, this will reveal the embossed resist leaving a distressed background.


Place the stamp in position to decide where to cut the curved die through the card.
 Remove the stamp and use low tac tape or a magnetic shim to hold the die in place for cutting.


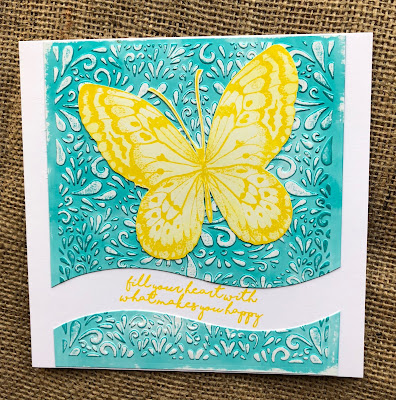
Stamp the butterfly onto smooth white card using the Versafine Clair.


Roughly cut round the butterfly edge and apply sellotape behind the antenna area, this will allow for easier detailed cutting, as the image has not been heat embossed which also makes cutting easier.
At this stage I also blended some Squeezed Lemonade distress ink over the stamped image.


Then fussy cut the butterfly. 


Mount the butterfly in position on the embossed, coloured card and glue in place.


Choose a sentiment to stamp and position the card pieces before gluing to determine how much space is needed for the stamped sentiment/s.
This is where a stamp press tool comes into it's own to stamp the sentiment/s in position on the card.


I stamped the sentiment with the Versafine Clair ink, look how crisp and vibrant the colour is.


 The embossed pieces can then be glued or taped into place


We had a lovely time using this technique at craft class and below are some more ideas and cards created in the class, aren't they all just fabulous!
Have a lovely day xKx 


Sunday, 29 October 2017

Making the most of an extra hour

Today I've been pottering about and getting some bits ready for a craft class on Tuesday.
I thought the day was whizzing by and then realised I hadn't changed my little clock in the kitchen.
So the realisation of an extra hour to my day was just perfect!.
In readiness for the darker nights and relaxing evenings I recently purchased
Lavender sleep balm from the local lavender farm and hop shop, along with a lavender wheat bag for neck and shoulder aches and pains.
They are just perfect for cosy winter evenings and the balm seems to be aiding a good nights sleep and what's not to like about relaxing warmth on your neck and shoulders with the soothing aroma of lavender.
This coming week I have a couple of classes to finish preparing for, one on Tuesday and one on Sunday and then it will be demo time again.
Last week I attended a local village craft market with craft supplies, gifts, techniques and inspiration, more details to follow on the next dates and info on the sidebar of my blog.
Here's a picture round up of recent activity, have a lovely relaxing evening, the light is already starting to go, love and crafty hugs xKx


and relax...


Craft class using Stix2 adhesives, foils and glitters along with various stamps including Woodware bubbles along with 


A little visitor posed for the camera! :-) 


Decoupage technique showing how to transform a simple wooden spoon into a pretty gift 


Thursday, 5 October 2017

Autumn scene Docrafts Xcut die cutting technique

Based on some stamping card samples below from an Autumn class held last year.
Today I am sharing a similar idea using die cutting techniques using Xcut dies from Docrafts.


I used the nesting leaves die set and cut into a piece of paper from the Wood Elements range, this is such a useful and versatile paper range and I have used it so much.


Behind the leaf cut outs I mounted paper from the Pigment Elements range, again another really useful selection of beautiful coloured papers.


Next I die cut elements from the Woodland Tag die set.


Something I do quite a lot which seems to be popular is to shadow some of the die cut elements with colours layered behind to make the image stand out more and give a 3D effect.
I have done this here with the Fox, Stag and Squirrel, layering a darker colour behind.


I chose some Autumnal card colours to mat and layer onto a Kraft card blank 


Finally I assembled the different elements, using foam pads for some of them to add different layers.
I also added various coloured leaves using the mini leaf die.


If you have any question on techniques or products used please don't hesitate to ask...