Thursday 26 June 2014

Party Animal Avery Elle Stamps and Sea Bubbles Designs by Ryn

A bit of fun with this tag with the Party Animal Stamp Set from Avery Elle which I teamed up with Ryn's Sea Bubbles.
I used Hero Arts Neon ink pads for the background, Party Animal balloons and to colour the seam binding.
Black and White Enamel Accents from Ranger added to the bubbles.
Hope you like this bright fun tag, thanks for popping by today, Crafty Hugs xKx


Sunday 22 June 2014

Chat Soon! Bristol/Worcester Workshop sample for Sept

I hope you like this sample, mixed media book cover using a book from a charity shop.
Using lots of things for the background texture and interest, torn paper, embossing paste through stencils, mesh ribbon, lace, cotton fabric to name but a few.
Adding some die cuts and steampunk charms then colouring with paints, mica sprays and gilding waxes.
I do love creating this texture and interest.
Thanks for looking xKx


Saturday 21 June 2014

Sweet Poppy Hat, Hero Arts Stamp you Story and Neon colours

I used the Hero Arts stamps with their Neon ink pads to create the background.
The arrows and wording are stamped in black archival and I sponged black archival through the hat stencil to get a really good black colour.
Sweet Poppy Hat 1 is available here
Thanks so much for looking xKx


Friday 20 June 2014

Sweet Poppy Love Birds

Using the fabulous Parrot from Sweet a Poppy Stencils I decided to give him a mate and turn them into a pair of "Love Birds"
With a simple distress ink background I stencilled the birds side by side masking off the parts I didn't want to use and reversing the stencil for the second bird.
I used shades of brown distress inks along with Peacock Feathers and Worn Lipstick.
The hearts are from the Hat 2 stencil and I added the Tim Holtz Hashtag "I Love You"
I think they make a perfect pair, simples!...xKx

Monday 16 June 2014

***Currently Booking***

Bristol Sat 6th Sept -
This will be held in a hall in the Pilming area which is 5-10 mins from the Old Severn Bridge Junction of the M48.
More details to follow


Warwick Sun 7th Sept
Childswickham Memorial Hall
Atkinson Street
Childswickham
Broadway
Worcestershire
WR12

£25 payable on the day
To book email craftyk@hotmail.co.uk


Spread your Wings and Fly...

My latest mixed media piece uses a heart shape mirror frame from Candy Box Crafts.
I've created layers using torn paper, gesso, matte multi medium, scrim, lace, beads and masking tape.
The colours are achieved mainly with LuminArte Silks available from Oyster Paper Crafts, I've also used blue, green and turquoise dylusions sprays.
Some of the texture has been created with Teresa Collins modelling paste, (again available from Oyster's), through Crafter's Workshop templates, Art is and Harlequin background.
The wooden hearts and doves were free ages ago in a magazine and the pearly embellishments are from Sweet Lilac Flowers.
I was inspired to do this piece when I saw the Jumbo stamps from Stampendous, Glance, Poppy and Butterflies.
My mission with this was to create a completely free piece of art that has no rules or boundaries, just find your artist wings and fly with it however the mood takes you.
I hope you find this inspirational, I loved creating it xKx

I'd like to enter this into the following challenge
Simon Says Stamp Monday Challenge "Anything Goes"


Sunday 15 June 2014

Summer Holidays with Sweet Lilac and JOFY

Today is the new challenge over at Sweet Lilac Flowers
Instead of sun, sea and sand I decided a diary/notebook page of places visited might give a different perspective.
A day out in a lovely garden...
So I used the JOFY Collection 11 stamps which I stamped over Hero Arts, Stamp your Story Notebook stamps.
I used watercolour paper and the Hero Arts stamps gave me my notebook page layout.
I coloured the images with LuminArte Silks paints, I think the shimmer shows quite well in this picture.
Then of course I added the Sweet Lilac Flowers, mounted onto Kraft card and added the green raffia.
Pop over to the blog to enter this months challenge and see the rest of the DT's wonderful creations.
Have a wonderful day, we're off out for lunch as it's Father's Day
Crafty Hugs xXx


Wednesday 11 June 2014

Samples for Sweet Poppy

Hope you managed to catch or record the show on Create and Craft yesterday with the lovely Lucy Ellis and Sweet Poppy Stencils.
The stencil designs and mediums are superb and Lucy's demo's are just so inspiring.
The exciting news is that some amazing new designs are just around the corner, I can't put into words how fantastic they are and there's not too long to wait before they're general release.
Anyway this is my first showcase for Sweet Poppy some of which were for the show yesterday and
some for Lucy's show display boards.

I'll pop back to give more detail about each one, today is the mirror frame below.
For this project I used the following stencils

I've used a Candy Box Crafts MDF Mirror Frame, these are great because you can add the mirror
after you've done all the messy work which saves masking.
I was inspired by Neil Walker for this project.
I stencilled all the images using a texture paste, for this project I used Theresa Collins Basically  Essential modelling paste.
I positioned the stencil images so that I could do them all together without having to let each one dry separately.
So I worked out where I would place the main stencil images and then carefully positioned the Teadrop background in between.
The Teardrop background is such a useful stencil, really is a must have.
Having said that, this paste is quite quick to dry and you can speed it up with gentle heating from a heat tool.
I then painted my frame using a tester pot of emulsion paint covering all the stencil work as well.
Before the paint was dry I used a damp cloth to wipe away from the stencilled areas to reveal the
stencilled images.
I placed the stencils back in position and applied Treasure Gold in White Fire, one of my absolute favourite gilding waxes over the images.
I brushed over lightly so it transferred some of the shimmer to other areas of the frame and then applied more wax around the inner and outer rims, finally finishing with the pearl, bow and tulle embellishments.
Thanks for looking today back tomorrow with more details from these makes.
Many thanks to my new followers both on here and my Facebook Page, such kind comments and wonderful feedback
Any questions please ask
craftyk@hotmail.co.uk
xKx
I'll be drawing a winner from the "CLOCK GIVEAWAY"  next week, it's been a bit hectic and the first opportunity I'll have to put all the names into the draw.
If you haven't entered by commenting yet on the post linked above please do so, I do read and very much appreciate all the comments left for me, thank you xxx


Posh Sweet Poppy Geese

Good evening,
Another Sweet Poppy DT make from me this evening.
I've used the lovely Geese stencilled through with black soot distress ink and gilding flakes.
I masked off a moon for the sky and added faded black soot gently with a sponge.
Added a ribbon bow and crystal ice Stickles.
The die cut shapes are spellbinders and I've completed with a black organza ribbon and bow all on crafter's companion pearlescent white card.
Maybe the start of my Christmas cards?...xKx

Clock Giveaway

Morning bloggers! :-)
Well it's tipping it down outside so I'm going to be working happily indoors catching up with all the jobs on my crafty list.
Life's good and on Thursday we celebrate my daughter Jennifer's 27th Birthday.
She's an amazing young woman, of course I'm totally biased, you'd never think she was born 9 weeks premature, weighing only 2lb 15oz (old money! ;-)
I also want to celebrate my Facebook Page reaching over 500 LIKES! Wow
I never thought that would happen in all my years of crafting.
I work hard because I absolutely love what I do and I just wish my dear old Dad, and a few others that are sadly no longer with us, was still here to see what I'm up to these days.
Dad had his own passion, his DIY shop for over 30 years and if he could see what I was doing with bitumen and white spirit he'd be smiling.
I'm sure he is smiling down and having a bit of a chuckle, I love you Dad.
I was always asking him for bits and bobs from the shop to assist in my crafting, he'd cut me picture frames, assist with paint, wood and sorts of requests that I gave him.
So it's kind of fitting that I'm where I'm at with my crafting just now and why I'm so passionate about what I do.
During the 30 plus years I've been crafting I've had a few knocks and set backs as we all have in life but, I've never ever given up or lost interest in what I love doing.
Anyhow those that know me know I have no hidden agenda or ulterior motive what you see is what you get, I'm a crafter through and through and it's got me through some incredibly difficult times.
I'm now in a position to be able to share what I do, which in my book is what crafting is all about and if it bring joy, happiness or helps someone else through a tough time then that just makes me so incredibly happy too.

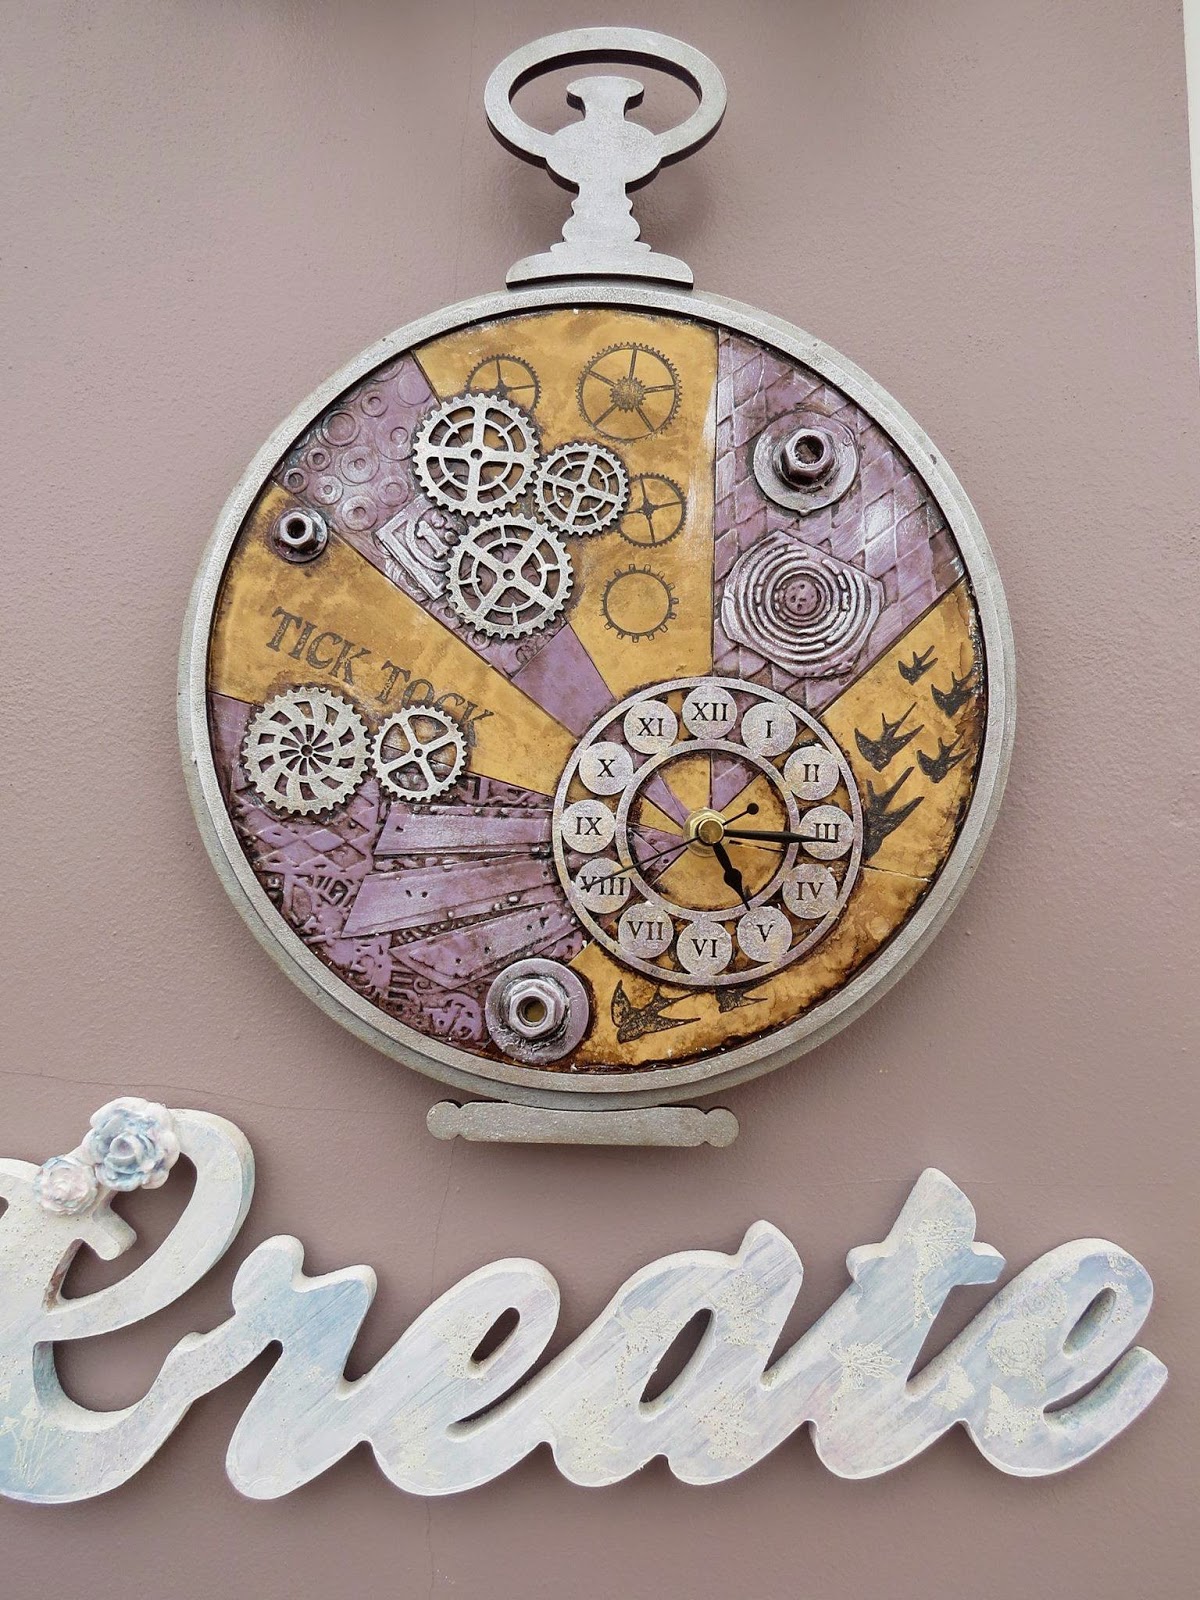
So I've shared a bit more about me and now I'm giving you the chance to enter into a "Lucky Dip" and the random chosen winner will receive one of my CD clocks. I'll email pictures to choose from.
All you have to do is leave a comment on this blog post and if you'd like to follow my blog that's great, likewise if you'd like to follow my Facebook page, I'd really love that too.
I really appreciate everyone's comments and feedback, they mean the world to me, thank you so much.
I look forward to hearing from you...Crafty Hugs xKx


Tuesday 10 June 2014

Sweet Poppy Love Hats

Good evening lovely people,
I've had a lovely day making my first DT card for Sweet Poppy.
The lovely Lucy Ellis invited me to join and I was so excited to accept.
I absolutely love these Hat stencils and immediately thought of a millinery store, then when I was in the shower my daughters shampoo bottle caught my inspiration! Lol In the colours I've used below it's called Tropical Fruits. My thoughts then went to Royal Ascot...
So I started by using stencil brushes to apply the colour for the hats and stands, I used distress inks in Tea Dye, Shabby Shutters, Worn Lipstick and Dried Marigold.
I masked off any areas I needed to so as not to put colour in the wrong places.
I then used Tumbled Glass with the Teardrop background in the areas I wanted to cover.
For the hats I wanted to decoupage them, I decided to do this by using a modelling/texture paste with my stencils I then cut the hats out and coloured with LuminArte Silks paints in Pink Azalea, Key Lime and Apricot Nectar.
I decided to dress each hat with embellishments and used ivory tulle net with a pearly buckle, pink ribbon, hat pins and gems, a feather and a pearly gem/button.
I used Pinflair glue to stick these in place.
Lastly I used the Love, from, Peace, Love and Blessings and made the word Hat from the
Home is where the Heart is stencil, coloured again in Worn Lipstick and cut around using a die from Spellbinders.
Lastly I matted onto a pale blue background.
I do love the result this gave me and I look forward to experimenting more with these lovely stencils.
Thank you for stopping by xKx


***Tarmac Technique MDF Clock workshop BOOKING NOW JULY 13th***

Sample project and completed designs from recent workshop are pictured below.
To secure your place for Sunday July 13th 10.30am - 3pm near Swanley, Kent
or for further info please email craftyk@hotmail.co.uk
I will then send a Paypal request for a deposit of £10
Further details will be sent nearer the time.
Thank you for your interest xKx


Saturday 7 June 2014

Fabulous New MDF Mirror Frames from Candy Box Crafts

I was over the moon to receive a fabulous new mirror frame from
Candy Box Crafts and one of their gorgeous new Piano's too...
Have you seen them yet? They're totally AMAZEBALLS.
I'm even more excited because even more crafty stash is on it's way too, how lucky am I.
Anyway my task was to work on the mirror frame and I know Roy is blown away by the Tarmac Technique so it had to be along those lines but I wanted to show something a bit different too.

As I've incorporated stamping into it it's also my parting design as I leave the wonderful
Visible Image Stamps DT. I've had an amazing three months there and it's gone in a flash.
It's been a complete pleasure working with Helen and Mark and the lovely DT and of course the fabulous stamps.
I know they will continue to go from strength to strength and I wish them all the best as I continue to follow them and the rest if the DT's inspiring work.
So my parting piece uses stamps from the new Fantasy Sets along with the Grunge Flourish and the Inky Bird for the dragon flames.
As I often do I had a vision of what I wanted to create for this great new MDF piece and it was
"A Fantasy Mirror" with of course the transformation from my "Magic Potion"
I've used a tree stencil/mask with Theresa Collins modeling paste, DecoArt chalky finish paints, DecoArt Metallic paints, tin foil, Viva Decor 3D stamp paint, Inka Gold waxes and Magical Tarmac!
The stamping areas are painted in the chalky paints, Heritage, Romance and Inheritance and stamped in the black 3D paint. The stencilled trees have been painted in the metallic paints, Rich Expresso and Crystal Green.
The Celtic circles have been layered onto punched circles to give them dimension.
I was happy with the outcome of this and there are also other great shapes for these frames, heart and flower so I'm looking forward to creating with those too and the other very lovely things I have to play with and keep me occupied! Lol

I'll be back soon with makings from my new venture with
Sweet Poppy Stencils as I was invited by the lovely Lucy to join their Design Team.
I've admired their products for so long and was recently inspired by Lucy to make a project after she had given me some guidance and a demo.
I never thought I'd be lucky enough to find myself on their DT! How fab is that!
I'm excited about working with the stencils and putting them together with the MDF pieces.

So here is my Candy Box "Fantasy Mirror" I hope you like it, thank you for looking today xKx


Thursday 5 June 2014

Visible Image Thursday Blog and First Sample for the Kent Workshop 22nd June

Good Morning,
So here's this week's Visible Image inspiration from me, I do hope you like it...
I absolutely adore the Wings on the new Fantasy Fae Hope set and the sentiment is just perfect too.
So I had a little sort out of my Visible Image stamps and looked at them all together, I knew I wanted to use the fabulous Grunge Flourish on the edge of a die cut hexagon shape.
The rest just fell into place, how perfectly do the wings flow with the flourish, it could almost be one stamp.
I loved this result!
Prior to stamping I'd used DecoArt chalky finish paints in Escape and Remembrance lightly sponged through a Crafters Workshop stencil called Cell Theory.
I also coloured a piece of card in the same paints and stamped the wings again which I the cut out and layered on my first stamped image to really make it "pop"
Lastly the whole thing is layered onto black card.
This is one of the designs we'll be using at the Kent Workshop in the 22nd June which is BOOKING NOW.
Thank you for looking today xKx


Monday 2 June 2014

Lavinia Challenge for June Add Beads or Gems

Morning,
Today sees the start of the new Lavinia Stamps challenge
 "Add some Beads or Gems" simples eh!
Each month we get such amazing artwork and entries and Jannine Barrett was the lucky winner this time receiving £40 to spend on the Lavinia website.
It would be great if you could join us for the challenge, it's a great prize.
So for this month I went monochrome again, I've been doing this quite a bit lately.
I made a set of 5 notecards that could be used for anything really, moving home, thank you etc etc.
I used the the Acorn Dwelling which I absolutely adore along with Star Gazing and Stars all available here.
I love the way both stamps had the little cobbles that I could join along the bottom.
I used Versafine inkpad to stamp all the images, added a gem for the door knob and the leaf beads/trim are from my stash and purchased from a cake decorating suppliers.
Each design is finished by adding some Stickles and layering onto coloured card at an angel.
I was very pleased with how these simple designs worked.
Please pop by the rest of the DT blogs to see what inspiration they've come up with too.
Challenge Blog
Hope you have a good week, crafty hugs xKx