There are lots of lush new goodies from Docrafts that I've had the pleasure of creating with for my next loop of demonstrations.
The first collection I've used is Moroccan Blue and Moroccan Haze, they are so lovely and everything coordinates wonderfully.
Monday, 26 February 2018
Friday, 23 February 2018
Circle cluster plaque for SamanthaKGifts
Here's a quick step by step for the circle cluster plaque made for SamanthaKGifts, Hochanda debut shows.
Using the medium long plaque and one of the circle clusters, both of which I quickly primed with gesso.
Then using a favourite technique I added some distressing, simply using the scourer part of a washing up sponge, far better than the use they are intended for!
The scourer is used to "dry brush" a couple of colours of DecoArt chalky finish paint, firstly in Yesteryear and then Relic, drying in between colours.
I use and teach this technique frequently and find it produces great results for distressing effects.
The circle cluster and plaque edges were then coloured with a gold gilding wax before gluing the circle cluster on to the plaque.
These clusters just shouted out to be filled with various beads, gems, glitters and embellishments.
It was a fun project to create and makes a lovely decorative piece that would look great in any colour choices.
I finished with some twisted soft wire and threads to hang the plaque.
Sam will be back very soon with more amazing goodies and I will be blogging the rest of the pieces I made for the shows.
Do take a look at her website and blog for amazing MDF pieces and inspiration from the rest of the team.
xKx
Using the medium long plaque and one of the circle clusters, both of which I quickly primed with gesso.
Then using a favourite technique I added some distressing, simply using the scourer part of a washing up sponge, far better than the use they are intended for!
The scourer is used to "dry brush" a couple of colours of DecoArt chalky finish paint, firstly in Yesteryear and then Relic, drying in between colours.
I use and teach this technique frequently and find it produces great results for distressing effects.
The circle cluster and plaque edges were then coloured with a gold gilding wax before gluing the circle cluster on to the plaque.
These clusters just shouted out to be filled with various beads, gems, glitters and embellishments.
It was a fun project to create and makes a lovely decorative piece that would look great in any colour choices.
Sam will be back very soon with more amazing goodies and I will be blogging the rest of the pieces I made for the shows.
Do take a look at her website and blog for amazing MDF pieces and inspiration from the rest of the team.
xKx
Thursday, 8 February 2018
Craft class candle wax resist technique
Today I'm sharing a step by step tutorial by request for a technique used recently at craft class.
It uses a wax candle to create a distressed resist background.
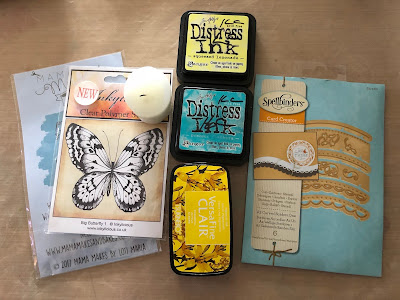
Sentiment stamps from Mama Makes, watercolour inspirations,
Spellbinders die set - card creator, curved borders 1,
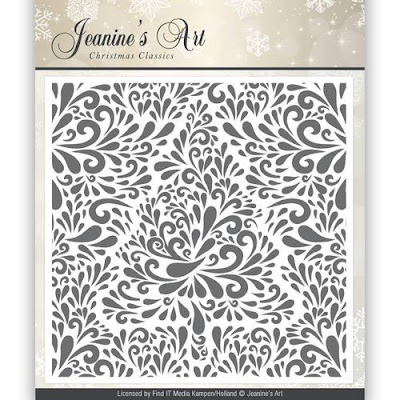
Jeanine's Art Christmas Classics embossing folder - Christmas Tree.
I also used distress inks and Versafine Clair cheerful ink pad, these ink pads are a dream to stamp with, I love their vibrancy and clarity.
To start with I've used the embossing folder and cut a piece of glossy card to size.
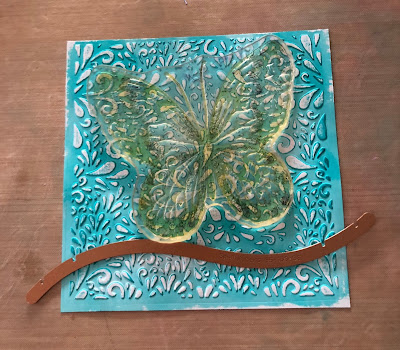
Once the card was embossed I rubbed the whole surface with the side of a candle to apply wax to the surface, then on top of the wax surface blended distress ink with a smoothie sponge.
The colour used is Peacock Feathers.
Place the stamp in position to decide where to cut the curved die through the card.
Remove the stamp and use low tac tape or a magnetic shim to hold the die in place for cutting.
Stamp the butterfly onto smooth white card using the Versafine Clair.
Roughly cut round the butterfly edge and apply sellotape behind the antenna area, this will allow for easier detailed cutting, as the image has not been heat embossed which also makes cutting easier.
At this stage I also blended some Squeezed Lemonade distress ink over the stamped image.
Then fussy cut the butterfly.
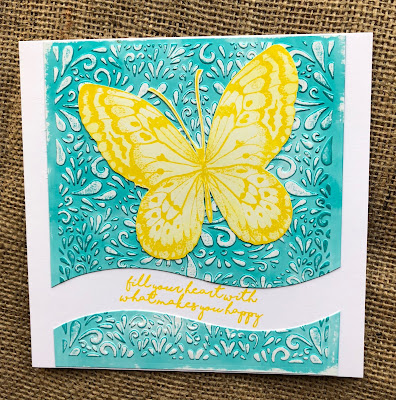
Mount the butterfly in position on the embossed, coloured card and glue in place.
Choose a sentiment to stamp and position the card pieces before gluing to determine how much space is needed for the stamped sentiment/s.
This is where a stamp press tool comes into it's own to stamp the sentiment/s in position on the card.
I stamped the sentiment with the Versafine Clair ink, look how crisp and vibrant the colour is.
We had a lovely time using this technique at craft class and below are some more ideas and cards created in the class, aren't they all just fabulous!
Have a lovely day xKx
Saturday, 3 February 2018
Needle Felting technique class
Yesterday I had a great time attending a lovely beginners needle felting workshop run by Judy, who along with her sister Roz own
Woolly Felters.
Fabulous talent and awesome creations by both these ladies!
On my agenda this year is to fit in time for new activities and things that I say I must do that but never get around to doing!
It's was so good to actually attend a craft workshop for a change and learn a new skill, very refreshing!
Friends of mine had attended these classes and thoroughly recommended them and yesterday did not disappoint.
The class was called Wee Woolly Wonkies and we could choose a character to make in the 2 hour 30 minute class.
I chose to create a Hare.
Now I though I was going to be rubbish to be honest and was seriously worried about pricking my fingers!
My doubts diminished quite quickly and I was pleased and quite surprised with how I took to the technique with Judy's expert tuition and written instruction.
I started off and progressed quite quickly but then the perfectionist in me took over a bit so I didn't quite finish in class by my own choice.
I found the features quite tricky but once I got home I soon tinkered with my character and got him completed and was very happy with the result.
At the moment I'm in the middle of teaching myself some basic weaving techniques, another task that was on my to do list! Lol
I do have a plan with here this is all heading but that is for another day.
So without further ado let me introduce you to Harvey Hare, I'm going to show my age here and refer to the 1950's film staring James Stewart with Harvey the rabbit, but I've chosen to name my Hare Harvey, he has a character all of his own and I really am a little in love with my first needle felted creations.
Enjoy your weekend, crafty hugs xKx
Subscribe to:
Posts (Atom)


